


A 3-Phase Guide to Cleaning Up Errors Before You Car Shop
The Investigator’s Audit: Turn Your Credit Report into a Case File
Your credit report isn’t a summary. It’s evidence. Treat it like a file you’re building for court. Stop skimming and start investigating—line by line—for every crack: bad dates, stale addresses, sloppy balances, claims no one can prove. This module moves you from knowing the scoring rules to auditing the data with precision.
Step 1: Build Your Toolkit
You don’t need fancy software. You need order.
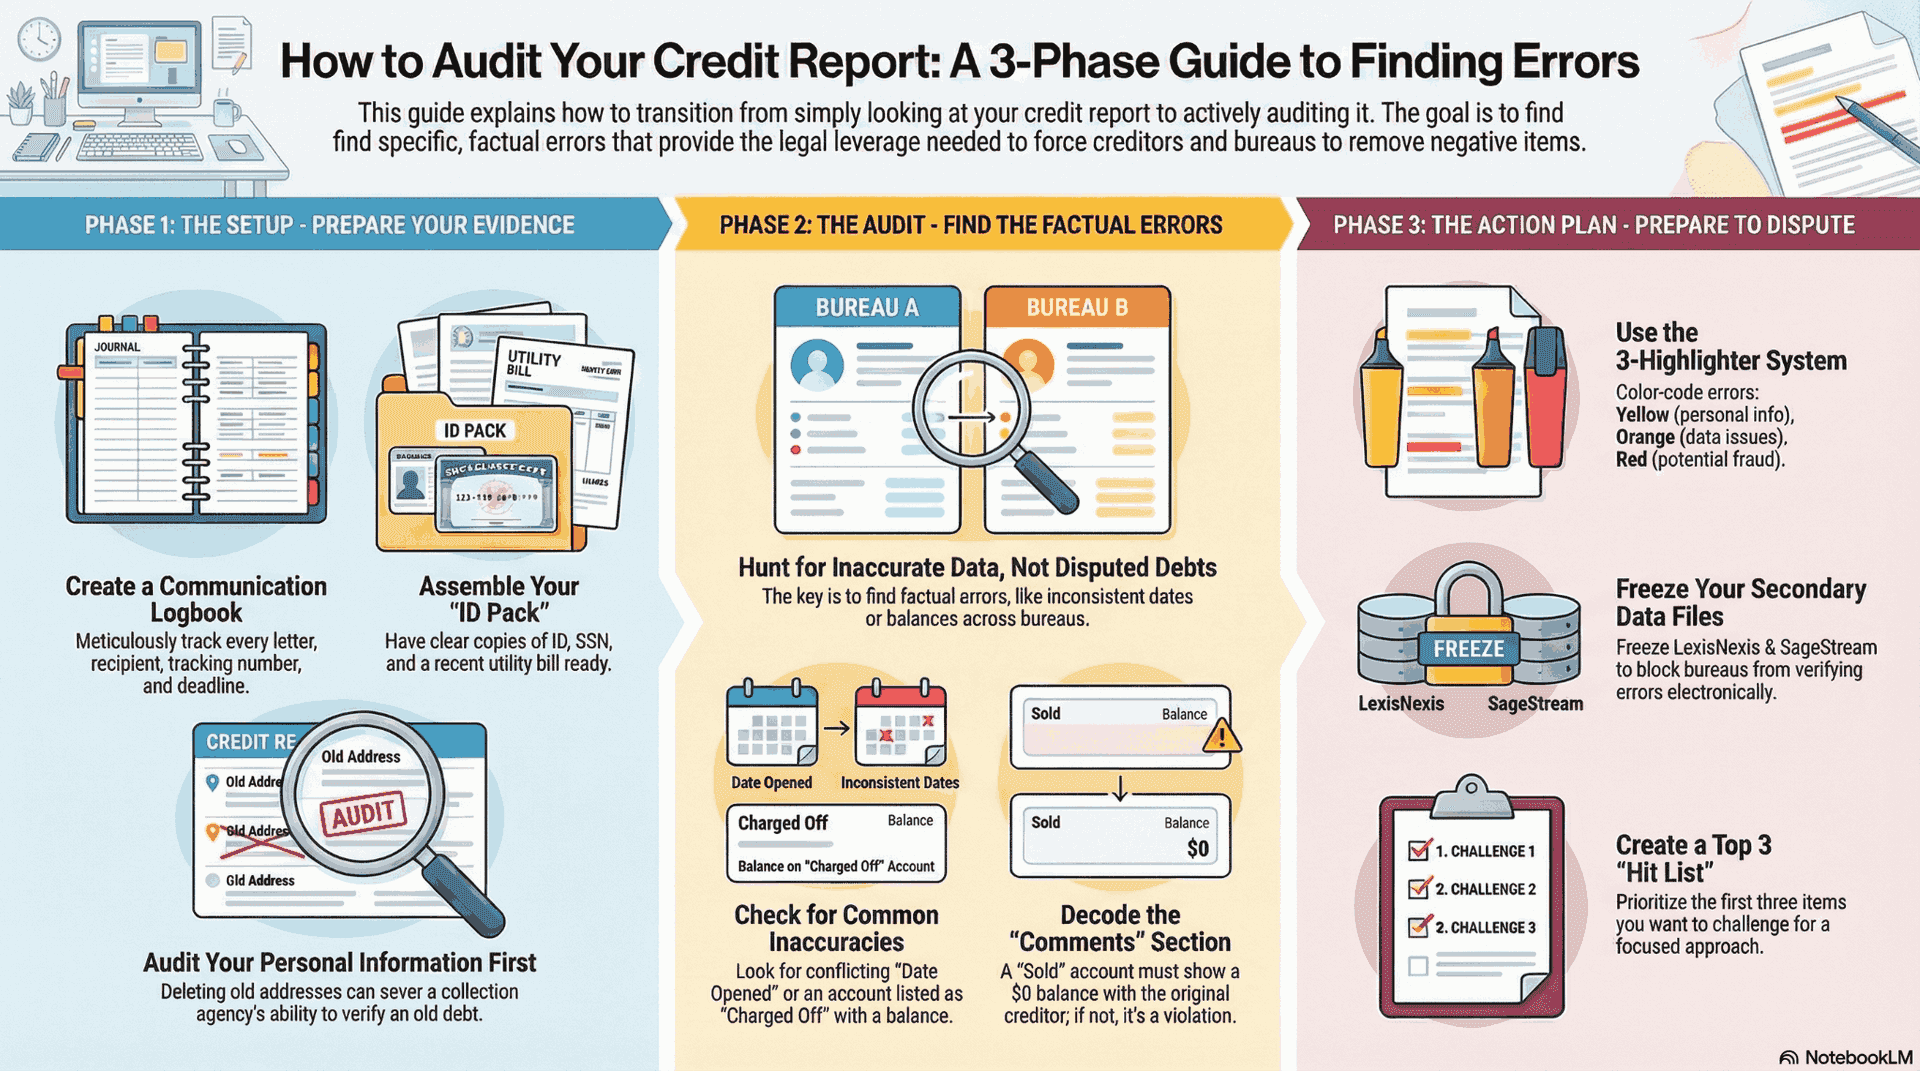
- Logbook. Record every move—dates, certified mail numbers, who you sent, who signed. If it’s not logged, it didn’t happen.
- ID Pack. Cut off stall tactics before they start. Include clear copies of your photo ID, Social Security card, and a current proof of address with your first dispute letter.
- Paper Trail. Documentation is leverage. Save PDFs, scans, envelopes, green cards—everything. Your file should answer questions before anyone asks them.
Step 2: Clean Up Personal Information
Skip the negatives for a moment. Start at the top.
- Fix the identity tangle. Flag every wrong name, spelling, extra middle initial, and outdated employer. Keep only your correct legal name and current details.
- Address strategy. Old addresses tie debts to you. Remove the ones you no longer use. If a collector can’t link a record to a current, verified address, verification gets a lot harder.
Step 3: Fact-Check Every Trade Line
Now the accounts. You’re not debating feelings—you’re hunting for facts.
- Match across bureaus. Compare Equifax, Experian, and TransUnion. Do the open dates line up? Are balances and limits consistent? Different “last updated” dates? Document each mismatch.
- Accuracy is the rule. Data must be complete, accurate, and provable. Any inconsistency is grounds to challenge.
- Transferred or sold? If the comment says “transferred” or “sold,” the original creditor reports a $0 balance. If they still show money owed, you’ve got leverage—note it and pull statements to back it up.
Step 4: Run the Freeze Protocol
When you dispute, the Big Three often lean on shortcut databases to “verify.” Cut that path.
- Freeze the specialty files (e.g., LexisNexis, SageStream) before you submit disputes. A freeze forces a real look at the records instead of a quick electronic match. Real reviews take time—and weak items crack under the deadline.
Your 3-Step Homework
- Highlight session. Print your reports. Color-code: Yellow for identity errors, Orange for account inconsistencies, Red for fraud or unknown items.
- Freeze protocol. Place security freezes with LexisNexis and SageStream. Save confirmations and PINs in your logbook.
- Target list. Pick the top three items to attack first—the ones with the clearest errors or the biggest score drag.
You’ve built a case file. You’ve mapped the weak joints. You’re not a passive reader anymore. You’re the investigator, and the record now has to answer to you.
0 comment(s) so far on A 3-Phase Guide to Cleaning Up Errors Before You Car Shop